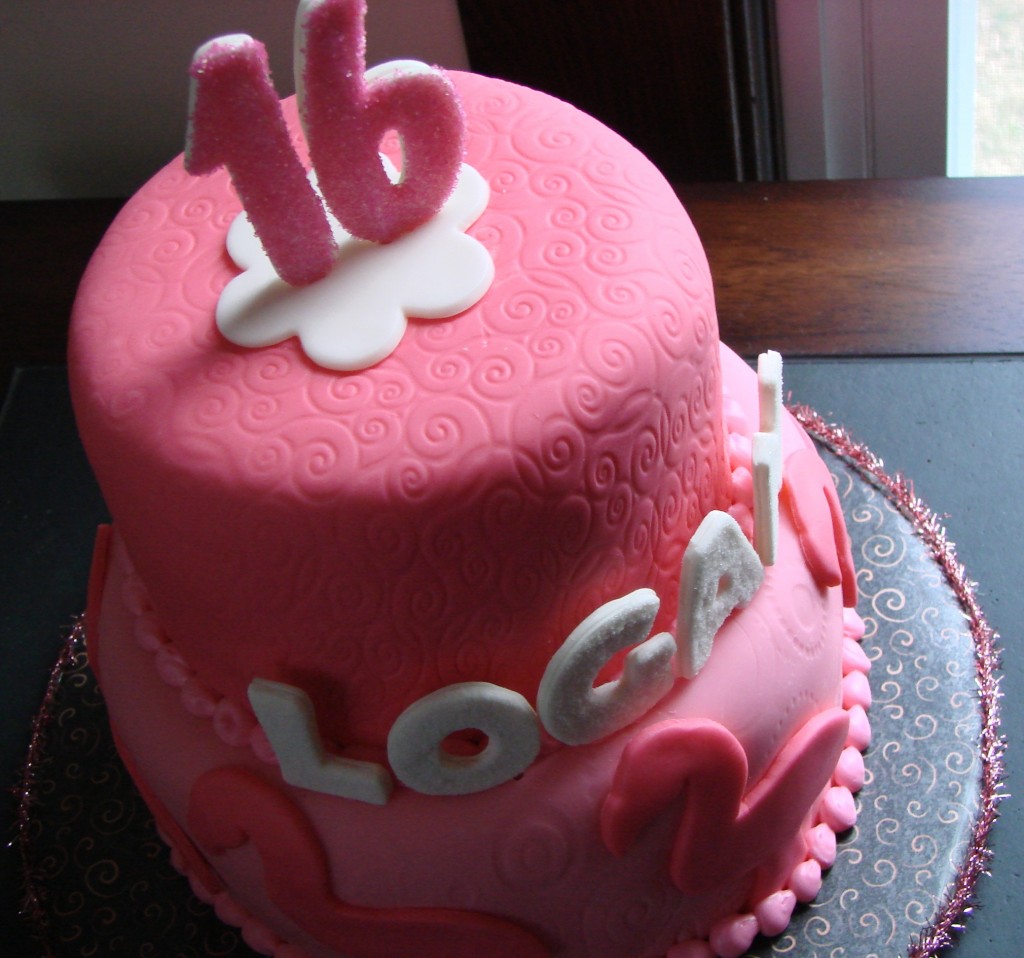
So today, I put away my sewing stuff and craft glue, and decorated a cake. A friend’s daughter is turning 16, and the theme of her “Sweet 16” party is flamingos. So I made a pink flamingo cake.
I had intended to take lots of detailed pictures as I went along, to show you the entire process, but I forgot. (Sorry!) Honestly, even if I had remembered, photographing it would have been a problem. There were clouds of powdered sugar everywhere… which cannot be too good for cameras!
The number 16, and the honoree’s name, are sugared gumpaste. You roll the gumpaste out, cut two of each number, then sandwich a bamboo skewer between each pair. (If they don’t stick together properly, you can just put a TINY bit of water in between, and then they should stick together just fine.) These “sandwiches” need to dry for at least 24 hours or more. Flip them over occasionally, so that both sides can get good exposure to the air. They are ready when they feel fully dry, and do not bend at all when you pick them up.
Once they are dry, paint a thin layer of clear vanilla or vodka on, and then sprinkle them with sanding sugar. Don’t use water for this; the high alcohol content of the vanilla or vodka will help the liquid dry quickly so that your numbers stay firm.
The smaller letters are done the same way, but using toothpicks instead of skewers. Many of the letters (O, G, A, and N) have two toothpicks in them to give greater internal support. When using two toothpicks, it is essential that they are perfectly parallel.
Both tiers are iced, then covered with fondant. The fondant has been rolled over an impression mat to give the tiers added interest. I’m not crazy about the outcome — the fondant stretched the designs out of shape in some places, but I do like the idea of it. There is a tutorial over at the Sugarcraft web site if you want to give this technique a whirl.
The flamingos on the lower tier are fondant cutouts, using a flamingo-shaped cookie cutter.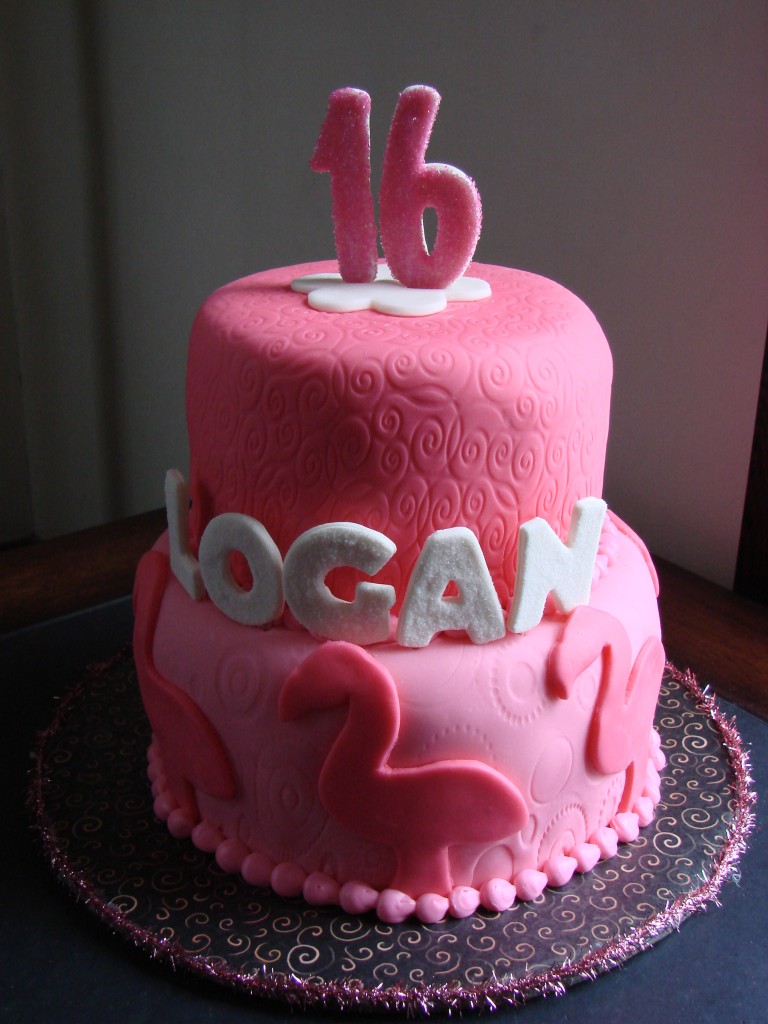
For the shades of pink, I used one gel food color, a rose pink, and just kept kneading more of it into the fondant to get the darker shades.
The bead border is just piped on. There is a good tutorial on how to do a bead border at the Wilton site.
I delivered the cake a few hours ago; can’t wait to hear how the party went!
