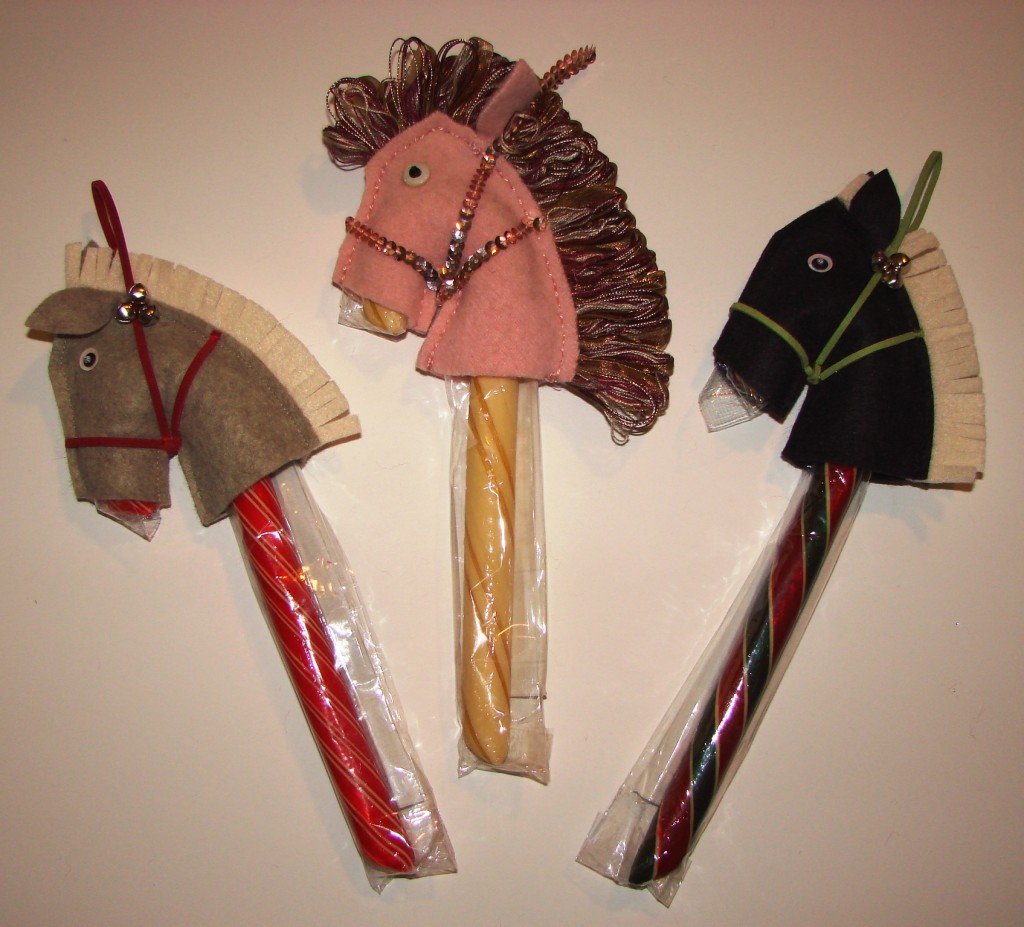
Candy Cane Stick Horses
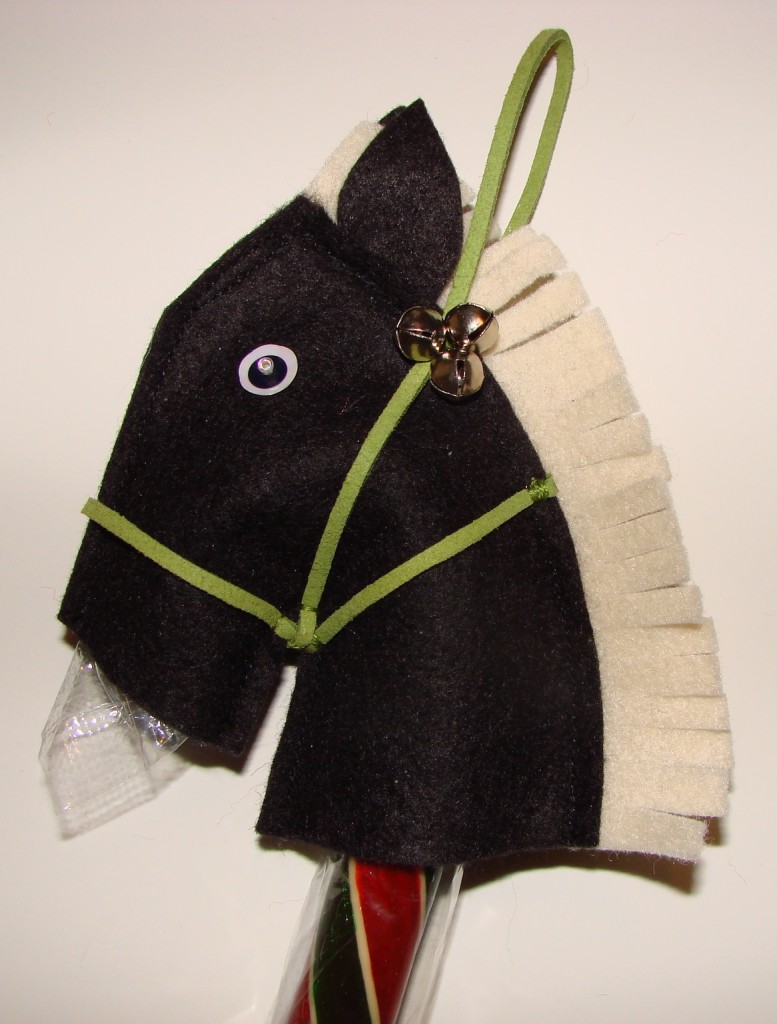
These ornaments remind me of childhood in so many ways! First, they conjure up images of kids romping around riding stick horses, pretending to be knights or Mounties or cowgirls. They also inspire me to reminisce about my own girlhood, when my mom would do crafts with us. The pattern for these felt ornaments is based on one from my mom’s old handmade pattern stash.
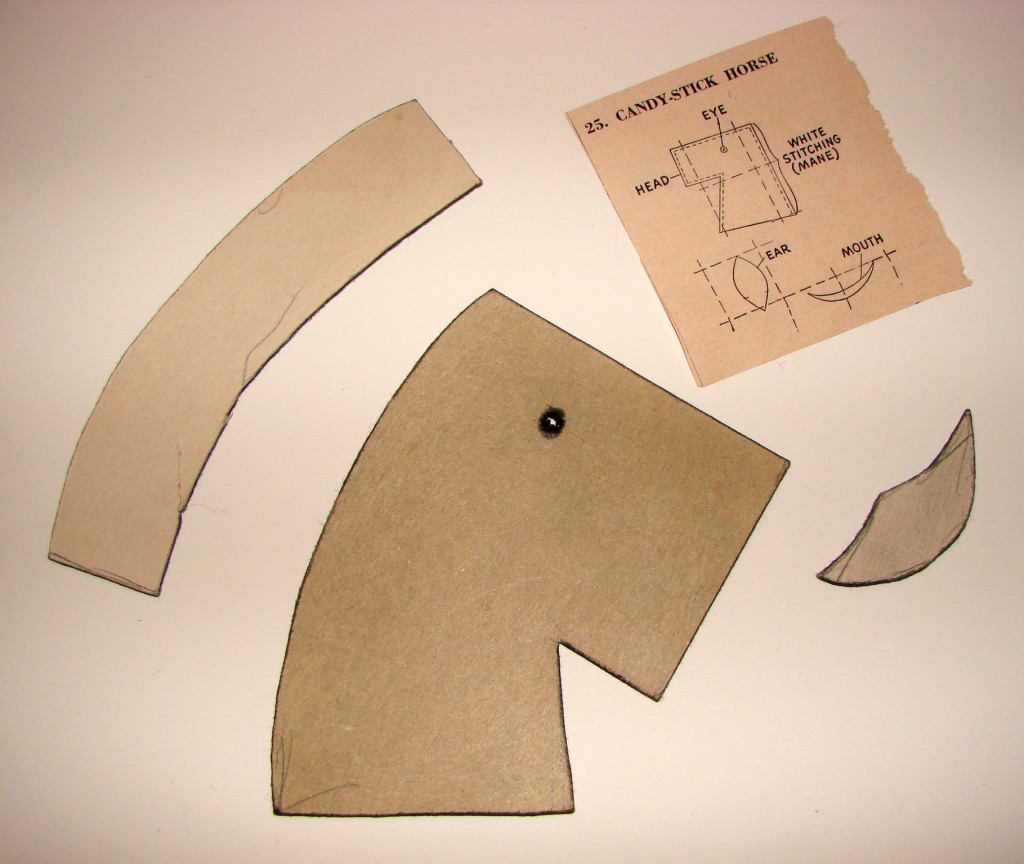
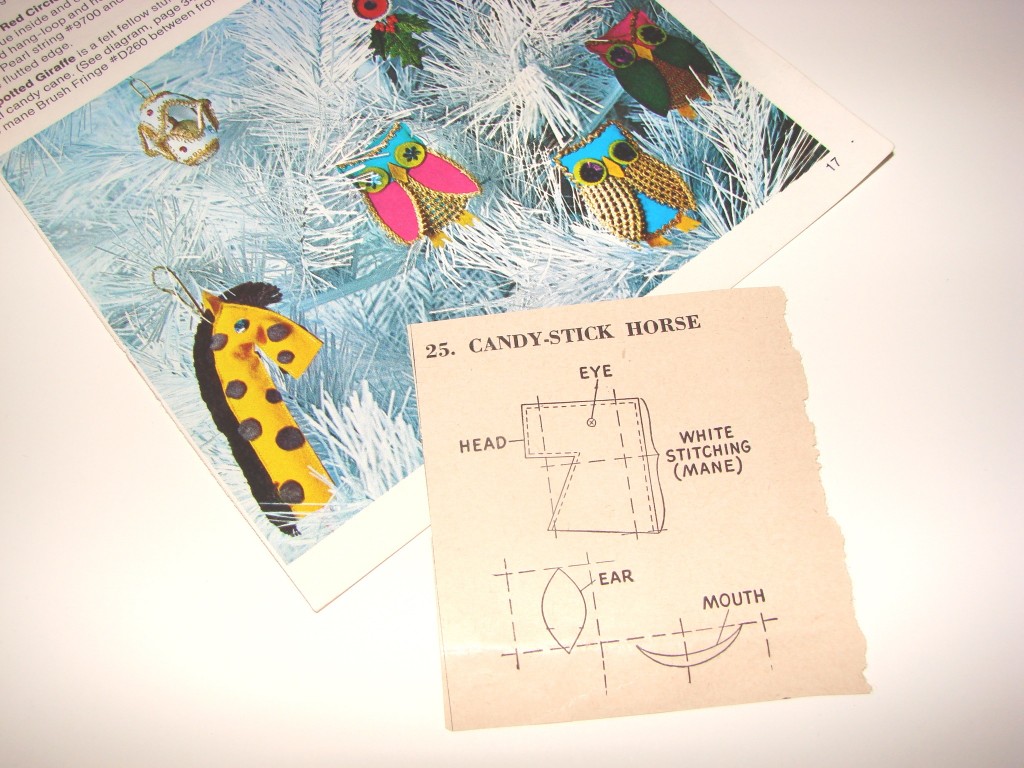
This pattern was stored in a plastic bag, along with a smaller version that had been snipped from a magazine. Mom’s version is a little different from the magazine one. The back of the head is curved on hers, and the ears are different. I, in turn, altered my mother’s design, by slimming down the nose of the horse and reverting to the original ear shape.
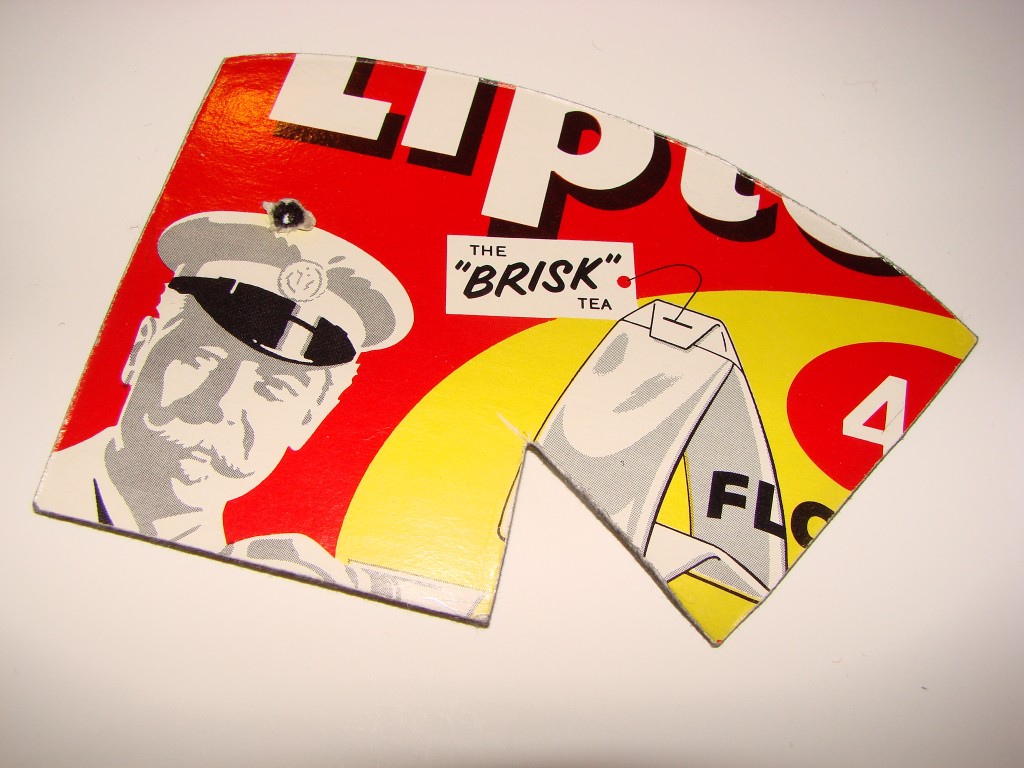
Like many of Mom’s patterns, this one was cut out of cardboard. She used whatever cardboard was on hand…
(We were big tea-drinkers in our household.) These sturdy cardboard patterns worked well; it was easy for little hands to trace around them directly onto the felt (using an ink pen or felt-tipped marker), and the hole made it easy to mark the position of the eye. More than likely, Mom prepared this pattern for use by our Girl Scout troop. She was our troop leader and we did a lot of felt crafts at our meetings.
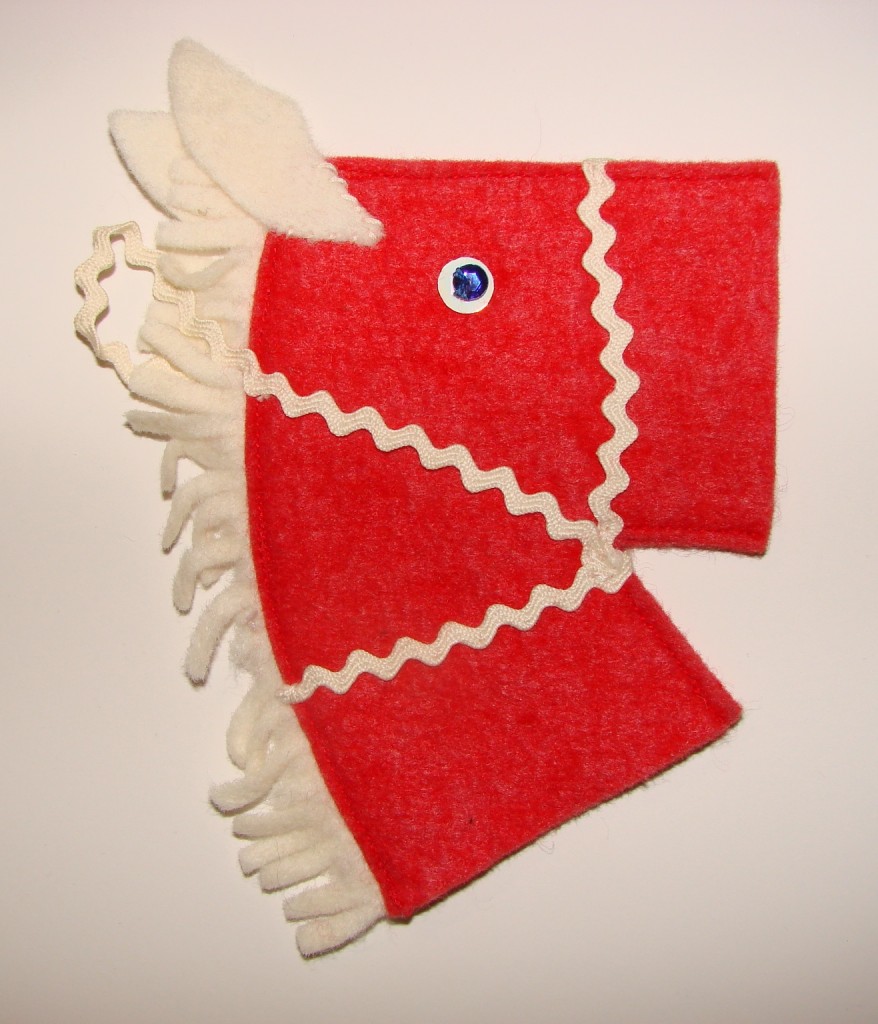
Also in the baggie with the pattern, a completed ornament, slightly worse for wear.
And a 1970’s craft booklet, showing a similar ornament, but in the form of a giraffe.
(Also some sequin-spangled owls and an ornament made from a couple of divots from a Styrofoam egg carton.)
If you’d like to try this craft, here are the basic steps:
Step 1: Cut out the pieces.
Cut 2 heads, 2 ears, and one mane. The head should be about 3 1/2 inches tall.
Step 2: Attach the eyes.
You can use buttons or googly eyes, but I like the look of layering a large white sequin, then a small black sequin, then a transparent seed bead. Make sure the heads are facing opposite directions when you sew on the eyes.
Step 3: Stitch the edges of the head, sandwiching the mane in between.
Start at the nose and stitch all the way around to the bottom edge of the mane. Then stitch from the chin and down the front of the neck. Leave the nose-to-chin area unstitched, as well as the bottom of the neck, so you can insert the candy cane. You can do this step with a sewing machine (which is how my mom did hers), or by hand.
Step 4: Attach the ears and snip the mane.
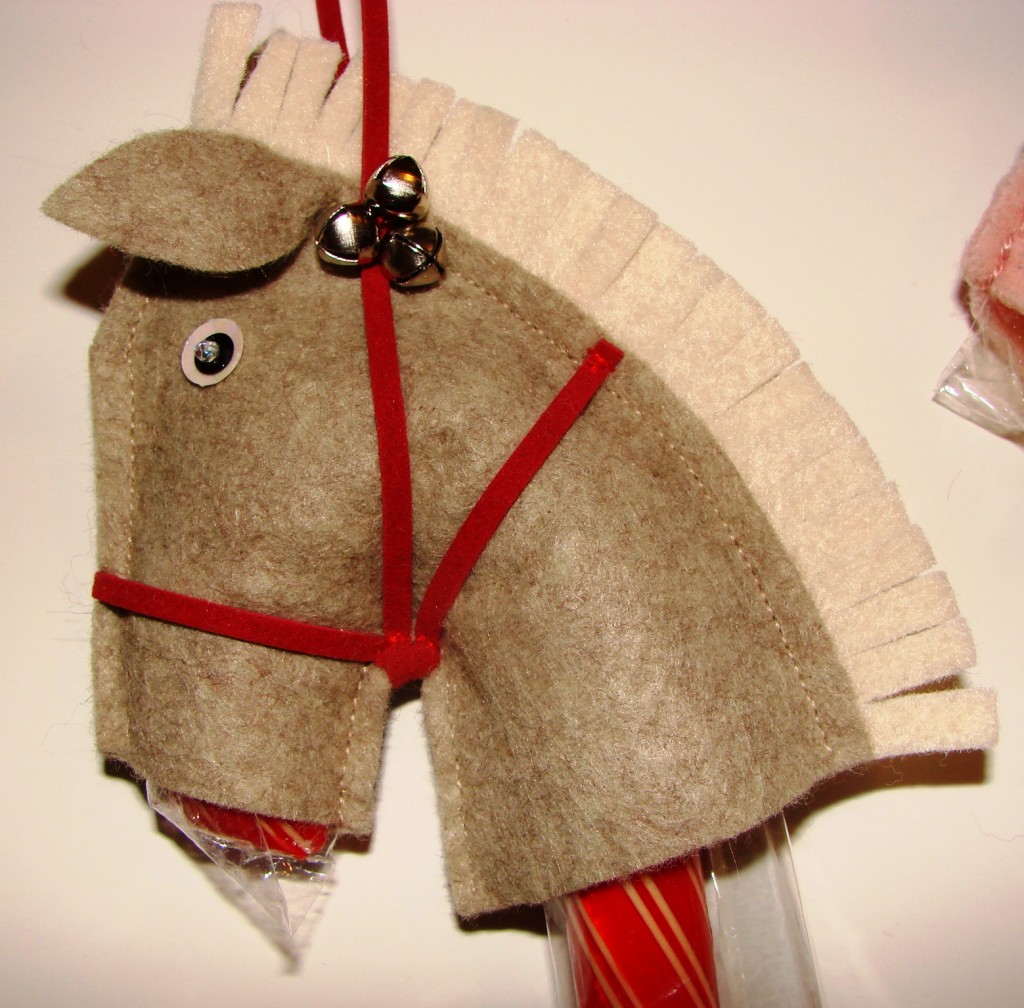
I experimented with different angles for the ears, and also tried doing both flat and 3-D versions. I’m not sure which ones I liked best. When you snip the mane, keep the snips parallel to the top and bottom edges of the mane and be careful not to snip into the neck of the horse.
Step 5: Add the reins.
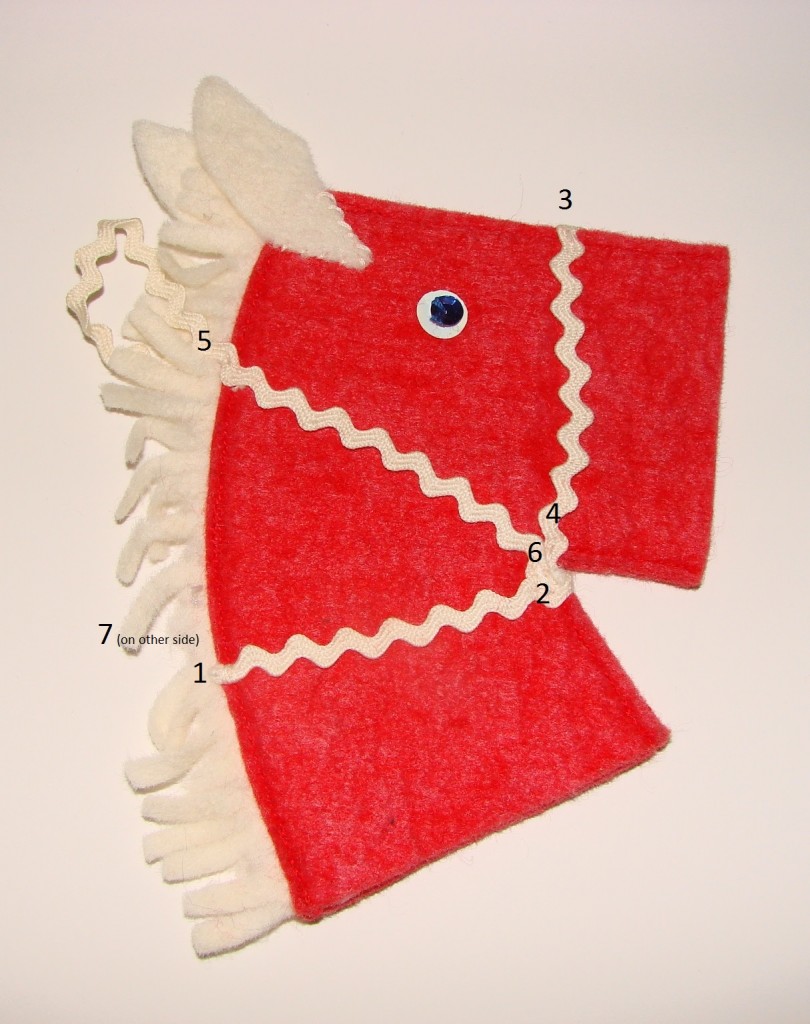
You’ll need about 18 inches of cord. Attach it just with a stitch or two, at each numbered connection point.
- Lowest “rung” of the reins, at the mane on Side A.
- The “V” point under the chin.
- Then wrap it underneath to Side B…
- …and all the way around the snout back to the original position on Side A (you can take one small stitch at the top of the snout if you want).
- Next, wrap the “middle rung” all the way around from Side B to Side A. Take a small stitch near the mane (through both layers of fabric) to hold it in place. Be sure to leave a loop at the top for hanging.
- Last, wrap it under the V point at the chin (taking a stitch there)….
- …and attach the end on Side B, at the same place you started (but on the opposite side of the ornament.)
Step 7: Decorate ornament (if desired) and insert the candy cane.
You can add jingle bells, or little ribbon roses, or some other adornments near the horse’s ears.
To insert the candy cane, hold the ornament upside-down and insert the hook end of the cane into the neck opening. Pull it around until it is right-side up. It will hold a standard 6-inch cane or a larger hand-pulled cane (up to 8 inches).
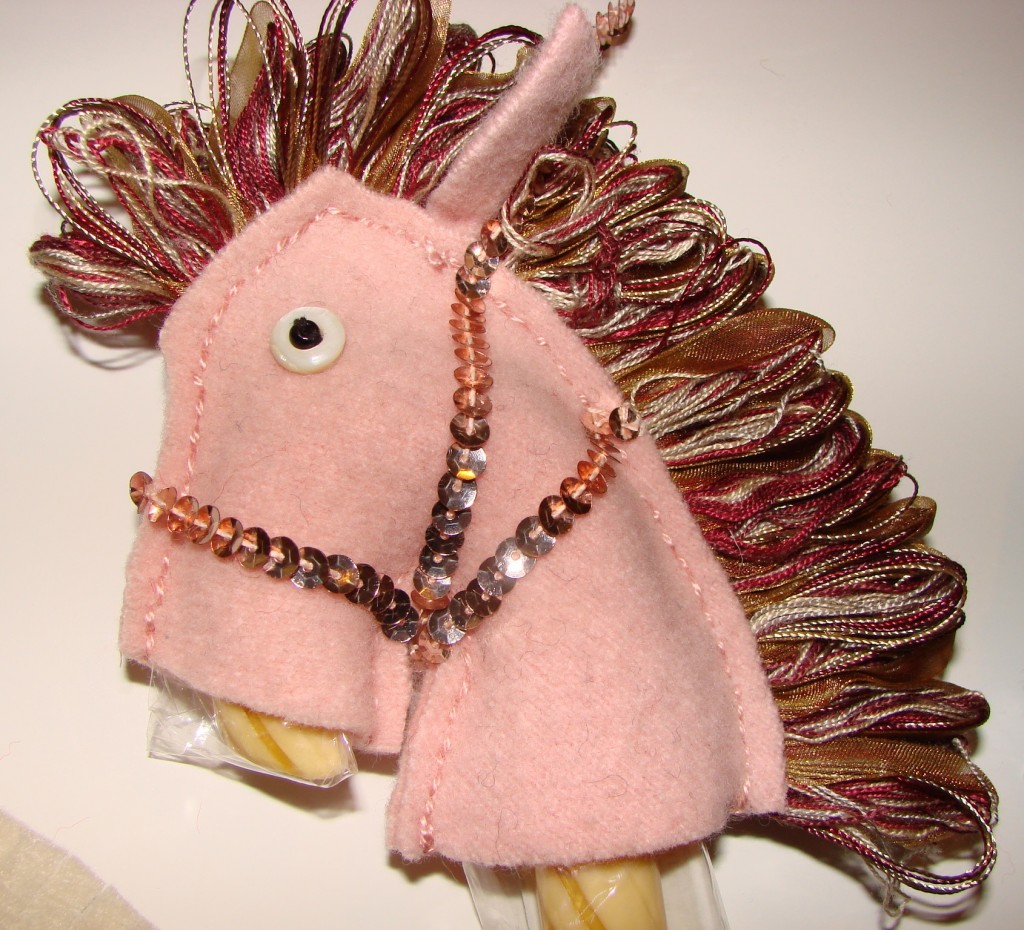
Here is one where I used a fancy trim as the mane, and wrapped it up onto the forehead. I think this one would be pretty as a unicorn also.
You can see how I altered the pattern. There is a triangle trimmed off the top of the snout, cutting from the forehead to the nose opening.
Please be aware that these are not safe for small children — some of the materials could be choking hazards. Please be cautious and provide adequate supervision.
Giddy-up and Merry Christmas!
